

Understanding Screen Burn-In on Older OLED Smartphones
Screen burn-in hits older OLED smartphones. Early detection might let you fix or at least reduce it without shelling out for repairs. Uneven pixel wear causes it, triggered by showing static images too long. The damage leaves faint marks—ghosts of buttons or icons stubbornly stuck on the display. That persistent glow dulls your screen’s pop, trapping navigation bars or parts of apps like stubborn shadows (give or take).
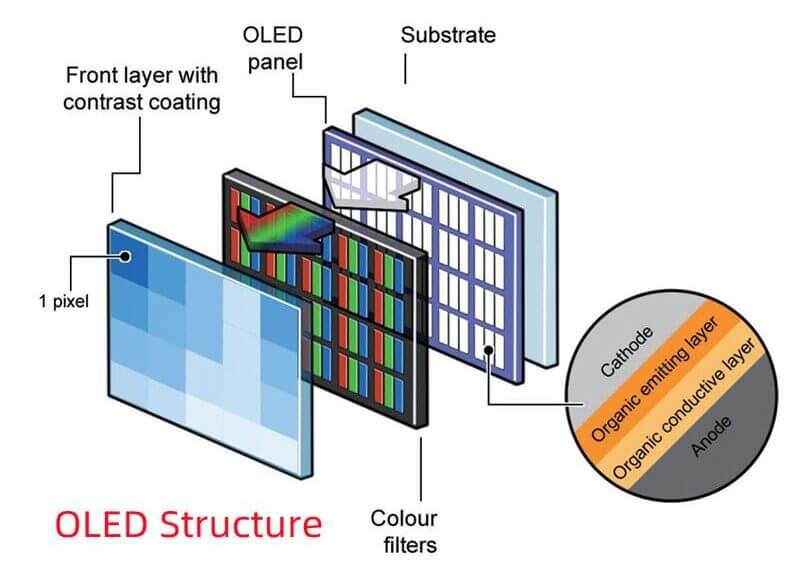
Burn-in happens mainly for a few reasons. These factors pile on, making pixels die unevenly, etching patterns you can’t scrub out. The organic LEDs in OLED displays gradually degrade, with blue pixels dimming more rapidly than their red or green counterparts. Leaving a high-contrast toolbar or keyboard visible for extended periods speeds up the aging of pixels due to static images. Crank up brightness for long stretches? That stokes the fire too.
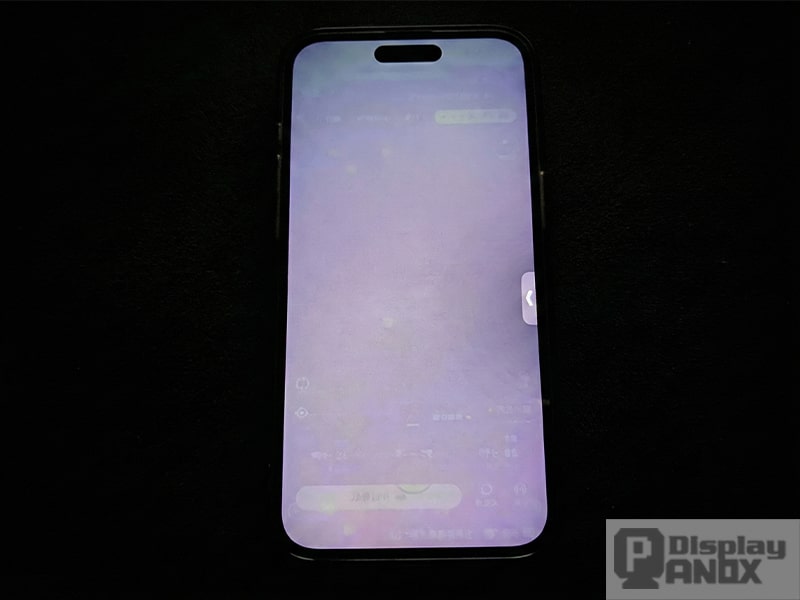
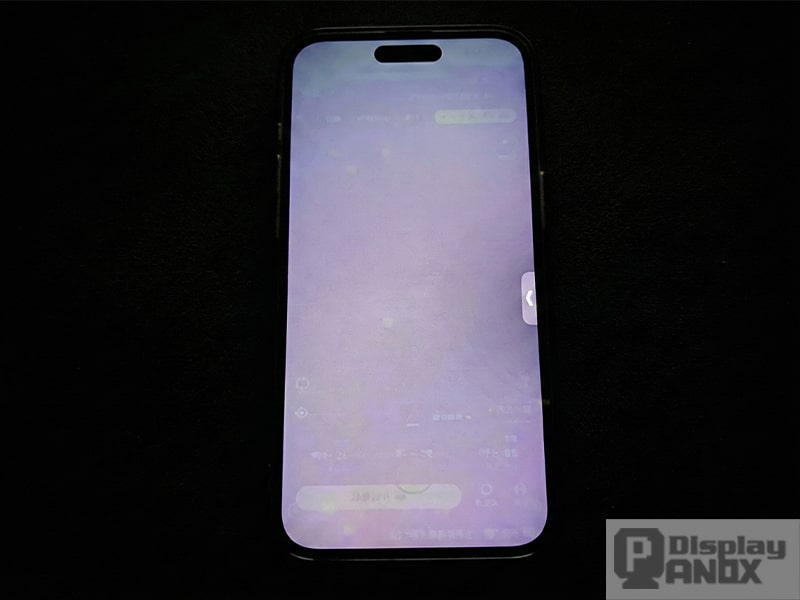
You’ll find signs in subtle but distinct traces of fixed interface elements (as a rule).
- Faint halos around icons or buttons.
- Dull spots where pixels seem drained next to brighter sections.
- Ghost images lingering after you switch apps or tap home.
- Color shifts or blotchy discoloration on sections that rarely change.
Burn-in creeps up quietly—soft and easy to overlook at first.
Spotting it early gives you a real shot at repair instead of tossing the phone.
What is Screen Burn-In?
If you can gauge how bad your burn-in is, you make smarter calls between home remedies or professional fixes. That makes an early screen check worth your time before dropping serious cash. Fixing it yourself is key, since official screen replacements often run into hundreds of dollars (as a rule). Some phone models are worse offenders, thanks to quirks in design or how owners use them.
How to fix burn-in starts with knowing these causes and signs before attempting treatments. Understanding that OLED’s organic layers shift over time guides you toward the most suitable solution based on your device and usage patterns. A careful, well-informed method might save both your display and wallet.
Researchers, including the Society for Information Display, explain burn-in arises because some pixels permanently lose brightness through overuse. Based on this, solutions have emerged that trim visible burn-in without swapping screens. These fixes demand patience and gentle handling but can make your display look markedly better.
Owning an older OLED phone involves trade-offs. Still, fighting burn-in head-on can add years to your device’s life. If screen quality matters to you and avoiding pricey repairs is a priority, learning to spot and treat this issue pays dividends. This article lays out what you need—straightforward and practical (in most cases).
- Diagnosing severity of screen burn-in on OLED smartphones at home
- Detailed step-by-step DIY methods to reduce screen burn-in without hardware replacement
- Scientific explanation of OLED pixel degradation related to burn-in
- Troubleshooting steps when common fixes do not work or worsen the condition
Essential Tools and Materials for Repairing OLED Screen Burn-In at Home
Burn-in on an OLED phone isn’t a quick fix. You need certain gear ready if you want a shot at real repair without messing things up more.
Start with a phone that shows clear burn-in marks, so you’re testing on the real deal, not guessing. Then, grab a laptop or desktop. You’ll need it to download and launch the pixel-cycling or color-shifting programs that can zap those ghost images away.
Clean the screen too; a soft microfiber cloth is best so you don’t scratch or add fuzz. Apps like OLED Tools or Screen Burn-in Fixer are built just for this—they run flushing patterns that coax tired pixels back to life. Before wiping, dampen the cloth with 70%+ isopropyl alcohol—it strips away greasy fingerprints but won’t fry the delicate display elements.
Once the treatment is complete, calibration software adjusts brightness and contrast to even out colors distorted by burn-in. You’ll want steady Wi-Fi because these apps often need updates or new settings.
If you want to get fancy, a black screen app or one showing uniform colors can highlight where the burn-in hits hardest. Don’t forget a USB cable that fits your phone for plugging into the PC—some fix tools require direct connection, not just wireless. Real precision matters.
How to Diagnose Screen Burn-In Severity at Home
Patience is a major player here. Set timers or use a stopwatch to follow treatment times exactly. Overdoing it risks frying pixels instead of reviving them (in most cases).
Keep these items close, organized and ready; that’s how you dodge interruptions and give your phone the best chance at a comeback without the sticker shock of a hardware swap.
Step 1: Identify the Burn-In Areas on Your OLED Smartphone
- Visual Inspection Under Uniform Lighting
Check your phone screen in a room with soft, even light. Burn-in looks like faint ghost shapes — maybe old app icons or button outlines — that stick around even when the screen changes. These shadows show pixels wearing out unevenly, plain and simple.
- Display a Solid Color Image
Put up a solid white or gray screen. Uneven pixel wear will create patches or darker spots standing out against the plain background. This trick helps you spot subtle burn-in that normal wallpapers or apps might hide.
- Run Dedicated Screen Burn-In Detection Apps
There are apps built just for this. They cycle through bright colors and patterns that exaggerate pixel wear. These apps often give you a visual report, making it easier to see hidden damage under the surface.
- Observe with a Dark Background
Switch to black. OLED pixels light up on their own, so burnt areas might glow weaker or look oddly colored against the dark screen. This can catch aging pixels you might miss on bright displays.
- Check for Color Shifts on Fixed Elements
Look at parts of the screen that rarely move — keys on the keyboard or navigation bars. If those leave a permanent trace, their colors might look faintly etched or weirdly tinted, even when the screen changes. That’s pixel fatigue at work.
- Use Pixel Test Patterns
Show grids of solid colors or smooth gradients. These patterns reveal brightness and color outliers. Burn-in spots refuse to blend in and pop out as irregular splotches among uniform blocks.
- Monitor Screen Brightness at Different Levels
Turn your brightness up full blast, then down to medium and low, watching carefully each time. Burn-in often stands out most at high brightness because worn pixels either over-glow or dim compared to their neighbors.
- Capture Photos of the Screen Under Varying Angles
Sometimes, your eyes miss burn-in that a photo reveals. Take pictures with the screen bright and tilt the phone. Ghost images or discolorations may appear in photos where you saw nothing in person.
- Note Device Usage History for Static Images
Think about which apps or widgets stayed put on your screen a lot — maybe navigation bars or chat apps. These “stuck” images tend to cause burn-in where they hang out longest.
- Document and Map Burn-In Locations
Once you spot these trouble spots, draw or write down where they fall on your screen. Having a map helps when you try fixes or want to track if the damage gets worse or better later.
Following these steps steadily peels back the mystery of your OLED screen’s burn-in spots. Pinpointing the damage means you can aim fixes right where they count, keeping your device alive longer (in practice). Burn-in comes from the organic layers in OLEDs fading faster under static images, so thorough checks matter before jumping into repairs. That’s why the spots change with colors and brightness — a quirk diagnostic tools use to make hidden burn-in visible.
For deep technical details on OLED wear and screen aging, check out NIST’s OLED degradation studies. They break down the chemistry and physics behind these screen troubles, backing the tips above with solid research.
Effective Use of Burn-In Fixing Apps for OLED Screens
Screen burn-in on older OLED phones can be tricky. These apps try to fix it by shifting pixels or flashing colors, pulling tired pixels back into action and fading those ghost images you see. The trick is patience and following clear steps—not just hitting “start” and hoping for the best.
- Choose a Reputable Burn-In Fixer App
Pick apps like “OLED Saver,” “AMOLED Burn-in Fixer,” or “LCD Burn-in Wiper.” They cycle through colors or nudge pixels to ease stressed OLED parts. You’ll find these on your usual app stores, updated for popular phones. Users praise their steady track records.
- Charge Your Phone Fully Before Starting
A drained battery kills momentum. These apps demand hours with the screen lit, chewing power steadily. If the phone dies mid-cycle, the fix can sputter or stop completely.
- Run the App in a Dark, Cool Environment
Heat speeds up damage. Keep your phone cool—preferably in a shaded room. Avoid baking it under direct sunlight or near heaters. Overheating can wreck the very screen you’re trying to save.
- Select the Appropriate Fix Mode
Options usually include color cycling, pixel shifting, or static color treatments. Color cycling runs the screen through bright shades, waking sleepy pixels. Pixel shifting jiggles the image slightly, spreading wear more evenly. Follow recommendations for your kind of burn-in—or mix modes one after another to hit all bases.
- Set a Manageable Duration (Typically 1 to 4 Hours)
Running the fix longer can help but risks screen strain. Many users report daily 1-2 hour sessions for a week tick down light burn-in. If your marks scream louder, consider cranking it to 4 hours—but watch for flickers or weird colors creeping in.
- Keep the App Running Without Interruption
Don’t leave the app or switch tasks. Calls, videos, or even locking the phone stop the pixel workouts cold. The screen must stay alive and front and center until the session ends.
- Monitor Screen Temperature Regularly
Some apps warn if things heat up; if not, check manually. Over 40°C, and you’re risking permanent harm. If it spikes, hit pause, cool down, then return.
- Repeat Sessions Across Several Days for Gradual Improvement
Fixing burn-in isn’t a magic bullet. You’ll probably need multiple sessions over days. Patience rewards you with less visible ghosting as pixels slowly even out.
- Combine Fixer Apps with Screen Brightness Management
Lowering brightness during fixes and normal use reduces stress. Many apps suggest dim screens to avoid making things worse. This double-whammy tactic helps stretch your OLED’s life longer than quick fixes alone.
- Use Dark Mode and Active Wallpapers Post-Treatment
After fixes, switch to dark mode or animated wallpapers. They cut down on static images that hammer pixels in one spot. Changing habits like these delays fresh burn-in from showing up.
- Check Results Regularly with Test Patterns
Apps showing uniform gradients or sharp grids can reveal your progress. Take “before” and “after” snapshots to spot fading burn-in. This feedback tells you when to keep going or stop.
- Consider Reinstalling or Trying a Different App if No Improvement Shows
If burn-in stays stubborn, try other apps with different patterns or stronger cycles. Some cases defy standard fixes and demand alternate methods. Swapping tools can reset pixel balance better than repetition alone.
Pixel shifting and color cycling apps give you a low-cost way to handle OLED burn-in at home. They won’t bring back pixels wrecked beyond repair, but plenty of users cut visible patches enough to keep their phones tidy. Dialing in correct modes, managing heat, and pacing treatments boost these digital fixes’ chances.
OLED pixels degrade because organic materials wear unevenly depending on what’s displayed, leaving stubborn ghost images behind. These apps push the screen to use all pixels evenly, fighting off streaks from long, static visuals. DisplayMate backs this approach, showing that forcing pixel refreshes via daily hours-long sessions helps rebalance output and prolong screen life as reported by DisplayMate. That’s your blueprint for fixing screen burn-in on older OLED smartphones without shelling out for expensive hardware swaps.
Step 3: Adjust Display Settings to Minimize Burn-In
- Lower Screen Brightness
Turning the brightness down cuts the power each pixel draws. This slows the wear that eventually causes burn-in. OLED pixels age faster when bright, so dimmer screens keep them healthier and make ghost images less visible.
- Enable Auto-Brightness or Adaptive Brightness
Adaptive brightness tweaks your screen level based on ambient light. When you’re in a dark room, it dims the display automatically. This prevents pixels from staying too bright for too long, reducing their gradual decay.
- Shorten Screen Timeout Duration
Set your screen to turn off after a short idle period. Pixels that show static images, like status bar icons, begin to fade unevenly when lit constantly. A faster timeout lowers that risk by letting pixels rest more frequently.
- Activate Dark Mode System-Wide
Dark mode swaps glaring backgrounds for near-black or muted colors. Since OLED pixels emit less light to display darker hues, enabling this cuts pixel power draw considerably. It’s an easy way to ease strain on spots already showing faint burn marks.
- Use Uniform or Changing Wallpapers
Wallpapers with bright, detailed sections can cause uneven pixel wear—sometimes called “hot spots.” Choose darker or subtly shifting wallpapers instead. This evens out pixel use, giving them a break and slowing image retention.
- Hide or Auto-Hide Navigation Bars and Status Indicators
Constant icons in navigation bars wear down pixels in those exact places. Many devices let you switch to gestures or hide these bars. Doing so cuts steady exposure and relieves those “stressed” pixels.
- Apply Screen Savers or Pixel Refresher Features
Some phones include screen savers that cycle colors or pixel refresher tools that pulse pixels gently. These features activate pixels briefly, balancing aging and extending overall display life.
- Adjust Font and Icon Sizes Moderately
Oversized fonts or icons concentrate light into tight clusters, which speeds up pixel burnout. Slightly reducing their size spreads light over a wider area. This simple change helps prevent uneven wear in common burn-in zones.
Every tweak shifts pixel use patterns and reduces static on-screen images. Applied consistently over weeks, they slow burn-in progression and might fade existing marks. Before considering costly hardware repairs, explore these settings first.
Research shows that lowering brightness and cycling pixel activity extends OLED lifespan without hardware changes. The U.S. Department of Energy details how OLED degradation happens at the material level, confirming that brightness control and pixel cycling are key strategies. Read their full analysis here: DOE’s OLED Technology Explanation.
Step 4: Manual Pixel Refresh Techniques
- Run a White Screen Video at Full Brightness. A bright white screen forces every OLED pixel to fire at once. This jolts each subpixel through a full charge cycle, evening out the tiny fades and burns caused by uneven wear. It’s a blunt tool—pushing all colors hard to coax sluggish pixels back to life.
- Cycle Through Full-Screen Solid Colors. Use a video or app that flips red, green, blue, and white screens at maximum brightness for about 30 minutes. Targeting each color channel separately, this wakes the organic layers tied to those hues and nudges stuck or dim pixels toward recovery.
- Activate Pixel Refresher Apps Designed for OLEDs. Some brands and indie developers make apps that run pixel-refresh patterns automatically. These apps flash strange colors and weird shades at irregular speeds. The goal: coax pixels to shed faded images gradually without needing your constant input.
- Lower Your Screen Brightness Gradually During Refresh Cycles. Start with full brightness to shock the pixels, then ease it down step by step. This cool-down throttles heat buildup, preventing further pixel damage and letting less-worn pixels catch up with those already faded in the recalibration marathon.
- Enable Full Screen Inversion and Scroll Testing. Flip the display to negative mode, then scroll slowly through static images. This swaps which pixels light up and which go dark, breaking the stubborn “ghosts” leftover from static icons or text displayed too long.
- Use a White Noise or Flicker Pattern Video. Videos that burst pixel activations in unpredictable blasts disrupt the fixed patterns that cause burn-in. This chaotic flickering forces tired pixels to spark irregularly, shaking them awake with random pulses.
- Perform Multiple Cycles Over Several Days. One round won’t fix much. You need daily sessions over a week or two to see real progress. Pixel degradation rolls back in slow motion; patience combined with steady routine tips the balance.
- Avoid Overheating During Pixel Refresh Sessions. If your phone heats up, stop immediately. Better to spread sessions out through the day or over several days than push through a hot marathon that burns pixels faster.
- Manually Inspect the Screen in Bright and Dim Environments. After each refresh, check your screen under different lighting. These comparisons reveal how well your efforts work and whether you need longer or brighter sessions.
- Combine Manual Pixel Refresh with Software Brightness Management. Using dark mode plus auto-brightness alongside pixel refresh cuts down pixel stress. Firing pixels less hard lowers burn-in risk, while the refresh routines patch damage already there.
Each of these tactics blends simple tools with hard OLED science. Pixels don’t fade evenly; static images can scorch some more than others. But running full-screen colors or white exercises the entire pixel array, waking the slow ones. Over time, regular use of these refresh hacks keeps burn-in creeping slower and postpones costly screen replacements. This echoes Scientific insights on OLED aging mechanisms explaining how OLEDs break down—and heal.
Couple the effort with cooling breaks and brightness tweaks to get the best long-term payoff. This slow, hands-on method suits anyone keen to stretch their phone’s lifespan (more or less).
Preventative Tips And Cautions For Home OLED Burn-In Repairs
- Don’t run your brightness full blast for hours. Bright light fries OLED pixels quicker, making burn-in worse. Turn down the screen or use adaptive brightness if you have it.
- Static images left on too long eat away at your screen. Set your timeout low so it dims or shuts off fast when you’re not watching. That prevents uneven pixel wear under icons or status bars stuck on-screen.
- Let pixel refresh or shift apps finish their run. Sometimes they take hours depending on your model. Killing them too soon wastes time and breaks the fix.
- Never squeeze or heat your screen thinking you’re helping. Pressing hard or heating can crack glass or fry tiny circuits inside.
- Skip third-party apps that blast colors or brightness past normal ranges. Pushing organic diodes beyond factory specs burns them out faster.
- Always use original or certified cables and power bricks during recalibration. Cheap or faulty power can send voltage spikes that fry parts.
- Try burn-in reduction software on a small corner first. If colors flicker weird or show glitches, stop immediately. That means it might cause more harm than good.
- Don’t slam calibration resets over and over without breaks. Doing that too fast stresses pixel drivers and messes up screen uniformity eventually.
- Wear soft, lint-free gloves when cleaning or touching the screen. Finger oils and dust slip under edges, trapping grime in tiny bezel gaps and making repairs tougher.
- Keep your phone out of direct sun or hot spots while working. Heat speed ups organic layer decay and can wipe out any gains from pixel cycling tricks.
These tips come straight from OLED science and repair forums in 2026. They slow down burn-in getting worse and stop new damage during home fixes. Being cautious gives gentle tools like pixel refreshers a chance before you swap hardware parts. If you want the nerdy details: the Society for Information Display shares peer-reviewed papers on how OLED materials handle electrical strain and heat over time at SID Technical Publications.
Essential FAQs on Fixing Screen Burn-In on Older OLED Smartphones at Home
Recognizing Screen Burn-In Versus Temporary Image Retention
Diagnosing Burn-In Severity with Basic Home Tests
Using Pixel Refresher or Screen Shift Features
Applying White or Color Cycling Videos for Screening
Avoid Using High Brightness for Extended Periods
Avoid Screen Uniformity Apps That Overdrive Pixels
Regular Screen Timeout and Auto-Lock Settings Matter
Using Dark Mode to Mitigate Burn-In Spread
DIY Screen Replacement Risks and Costs
When Professional Repair Is the Safest Option
Common Misconception: Screen Burn-In Can Be Fully Reversed at Home
Importance of Diagnosing Before Attempting Fixes
Using Screen Burn-In Fix Apps Only as Complementary Step
Watching Out for Signs Screen Burn-In Is Worsening
Cleaning the Screen Properly Before Testing Burn-In Severity
The Role of Firmware Updates in Reducing Burn-In Risk
Buffer Time Needed for Burn-In Fix Treatments to Show Effect
Avoid Confusing Screen Damage with Physical Scratches
Monitoring Battery Impact During System Fix Processes
Realistic Lifespan Expectations for Older OLED Screens
Burn-in tells a story about how your pixels age on OLED devices. If you follow clear steps to check and carefully use home fixes, you slow down wear while getting ready for a screen swap someday (give or take). That keeps your phone useful a bit longer.
Recent studies from display labs highlight how balanced pixel use and controlled brightness stretch OLED life and cut burn-in risk over years of phone use [source: NIST OLED Degradation Studies].