Step-By-Step Guide To Fixing High CPU Usage Caused By Background Windows Processes
Understanding High CPU Usage From Background Windows Processes
When Windows runs background processes, sometimes they grab more CPU than usual. System updates, antivirus scans, file indexing, and scheduled app tasks often run quietly in the background without alerting you. These jobs are normal, but when they overwork the CPU, your computer’s speed dives.
Programs may freeze or lag. The CPU hogs can slow the whole system down (for the most part). For laptops, the battery drains quicker too. Users feel it—delays, stuttering apps, even surprise restarts pop up. Fixing this isn’t just about convenience; it protects your hardware by avoiding stress and overheating, which wear out parts faster.
Several causes hide behind these CPU spikes (broadly speaking). Faulty software loops, outdated drivers, and clunky background tools often kick off the problem. Sneaky malware or adware can jack up CPU use, sneaking in where you don’t expect it. Tasks like Windows Update or Superfetch sometimes hit high CPU briefly, but if that lasts, something’s broken under the hood.
Once you know which processes are gluttons for CPU, you can cut back or turn them off safely. The fix starts with hunting down the CPU culprits. If left unchecked, your system wastes power, struggles to juggle multiple apps, and might throttle the CPU speed to keep temperatures down. That throttle drags performance across the board.
Ignoring CPU-thirsty processes risks crashes during key work or software clashes. Knocking down their usage speeds up switching between tasks, cleans up media playback, and improves battery life noticeably.
Understanding Background Windows Processes
It explains how to track system activity, pick out troublemakers, and tweak settings carefully to bring balance back. This guide shows you how to spot and tame high CPU use from background Windows tasks (broadly speaking). You’ll learn ways to manage your PC’s workload without breaking security or losing features.
Spot signs of high CPU from background tasks
Use system tools to watch CPU usage
Safely pause or shut down processes you don’t need
Keep your system updated without letting CPU run wild
Guard against malware hiding as background processes
The problem is common and usually fixable with some simple actions. Fixing it helps your computer last longer and run smoother at what matters most. Grasping how background processes push CPU demand is the key first move.
For detailed, official info on CPU load and performance testing, the U.S. National Institute of Standards and Technology provides thorough resources on measuring processor strain in real-world use: Performance Measurement of CPU Load.
✅
Fact-Checked
Editorial Review
🧠
Expert Analysis
Sourced & Cited
🗓️
Updated 2026
Current & Accurate
Understanding Background Windows Processes and Their Impact on CPU Usage
Background Windows processes run silently to keep your system stable, secure, and updated. When they ramp up, CPU usage spikes, and your computer may feel sluggish (as a rule). They usually don’t need your input. But sometimes, they gobble up a lot of CPU power, slowing things down. These processes handle things like hardware management, software updates, and system utilities.
Windows handles dozens of these processes. They run to manage routine tasks. Though necessary, they aren’t always efficient. The system tries to schedule them so your work won’t be disturbed. But if errors pop up, or if processes clash over resources, CPU use can jump suddenly (broadly speaking). This can cause your machine to lag or even run hot.
Here are some common offenders:
Windows Update (svchost.exe hosts wuauserv): Checks for, downloads, and installs updates. When big patches come in, CPU demand can surge sharply.
Antivirus Scanning (MsMpEng.exe for Windows Defender): Runs malware scans regularly to keep your machine safe. Full scans often hog CPU cycles.
Windows Search Indexer (SearchIndexer.exe): Builds a file index to speed up searches. Reindexing when files change can ramp up CPU use.
Superfetch/SysMain: Loads frequently used apps into memory ahead of time. This service’s caching sometimes taxes your CPU.
Background Intelligent Transfer Service (BITS): Moves files quietly in the background, especially updates, using CPU during large transfers.
Runtime Broker (RuntimeBroker.exe): Checks app permissions and manages communication between Windows apps and your system.
Disk Defragmenter (Defrag.exe): Rearranges file storage on mechanical drives occasionally, spiking CPU while it runs.
Task Scheduler Jobs: Automated tasks triggered on schedule, like telemetry data gathering or system tests, which can use CPU resources.
These run behind the scenes, unlike programs you open and control. Because they’re invisible mostly, users don’t always notice when CPU use jumps up. Brief bursts are expected. But if CPU stays high for too long, that’s a warning. Perhaps an update got stuck or an antivirus scan fights another process.
They keep your system healthy. Diagnosing is key before you try fixing or killing processes. Stopping background tasks blindly can cause trouble. You need to spot exactly which process is acting up first. Tools like Task Manager or Resource Monitor show what’s using CPU right now.
How to Identify CPU-Intensive Background Processes
Their timing, interaction with programs, and reaction to events affect total CPU demand at once. Knowing how these tasks intertwine helps you solve high CPU issues. Spotting usual culprits and their normal patterns makes it easier to tell when something’s wrong.
This helps users see which are key and which are optional. Microsoft explains these processes and their roles clearly in Windows. Learning this sets you up to follow a Step-By-Step Guide To Fixing High CPU Usage Caused By Background Windows Processes. You’ll balance system upkeep with smooth running. For anyone managing Windows devices, this knowledge aids in prevention and targeted fixes (give or take).
Handling these details well can mean the difference between a quick hiccup and a persistent bottleneck. A visual guide on using Task Manager and related tools to spot CPU-heavy processes fast and reliably. This method helps you take focused action to cut high CPU caused by background tasks—without risking your system’s safety or stability.
Diagnosing High CPU Usage Using Built-In Windows Tools
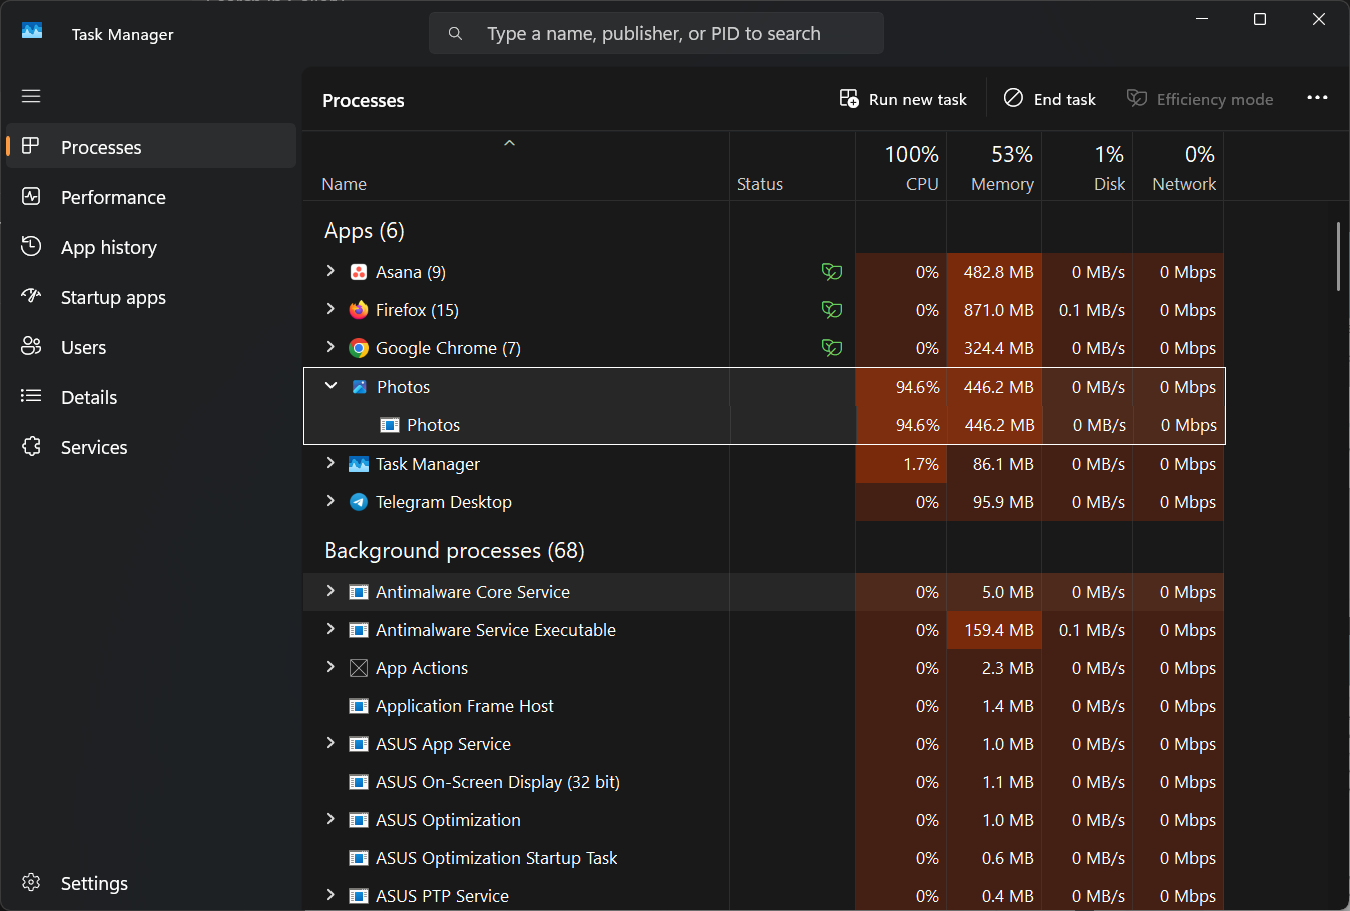
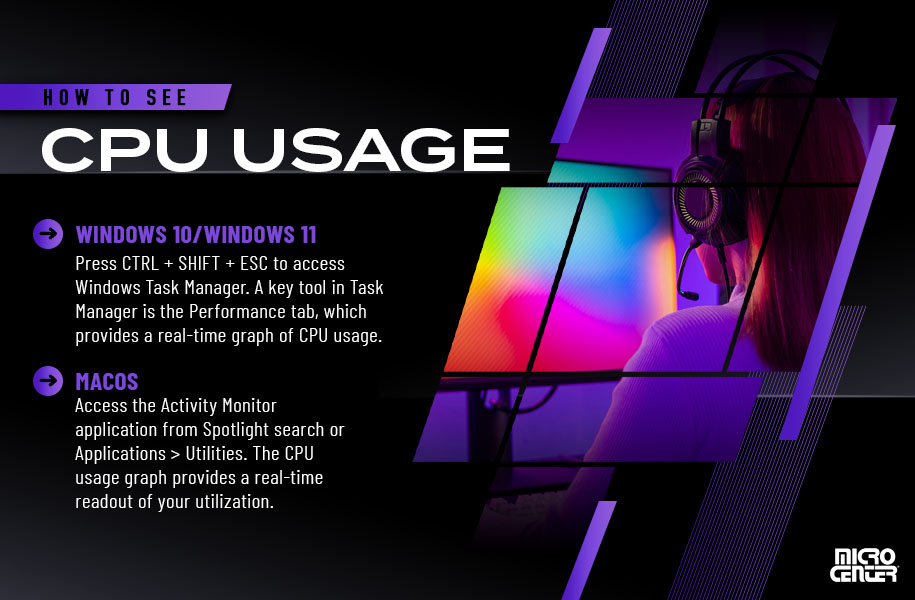
Open Task Manager with Ctrl+Shift+Esc
Hit Ctrl+Shift+Esc. No menus, no clicks—just straight to Task Manager. This shortcut saves you precious seconds when the system starts lagging hard.
Switch to the Detailed View
See a simplistic Task Manager view? Click “More details” at the bottom. Suddenly, CPU, memory, disk, and network stats flood the screen. Every process pulls its weight here, giving you the first clues about resource hogs.
Sort Processes by CPU Usage
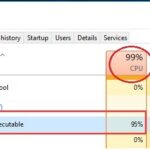
Click the “CPU” header. Processes reorder from highest CPU user to lowest. The top-listed ones are the main suspects chewing cycles. Spotting the biggest offenders becomes second nature.
Identify Suspicious or Unknown Processes
Look for odd process names or those monopolizing CPU time. Processes like “System,” “Antimalware Service Executable,” and “Windows Update” often flood the CPU legitimately. But if you find weird or unfamiliar names, dig deeper—they might be malware or flaky apps.
Right-Click and Open File Location for Unknown Processes
Right-click the suspicious process, then choose “Open file location.” If the executable lives in “C:\Windows\System32,” it’s likely safe. Anything outside that folder deserves scrutiny. Some might be third-party apps, others malware.
Use Resource Monitor for More Detail
Press Windows+R, type “resmon,” and hit Enter. Resource Monitor opens. It reveals CPU load per thread inside each process—an X-ray exposing the exact culprits behind your sluggish CPU.
Switch to the CPU Tab in Resource Monitor
On the CPU tab, usage breaks down by process and thread. It also shows related services and whether a process is running or stuck waiting. Seeing wait states helps explain slowdowns even when CPU use isn’t spiking.
Check Process Handles and Modules
Select a process in Resource Monitor’s CPU tab, then inspect handles and modules below. If a process drags many handles or heavy modules, expect CPU spikes often tied to disk or network actions lurking inside.
Record High CPU Spikes Over Time
Use Task Manager and Resource Monitor graphs to track CPU bursts. A regular surge from one process? Scheduled scans, update tasks, or even memory leaks might be the cause. Tweaking or disabling these could be necessary.
Use Task Manager’s “Analyze Wait Chain” Feature
Right-click a high-CPU process and pick “Analyze wait chain.” This tool shows if your process waits on another or is stuck. Breaking these chains often frees CPU resources without killing key system jobs.
Use Windows Event Viewer for Warnings
Type “eventvwr” in Run to open Event Viewer. Look through Windows Logs > System and Application for warnings about CPU, drivers, or app crashes coinciding with CPU spikes. These logs hint at hidden issues gnawing at your processor.
Use Performance Monitor for Extended Tracking
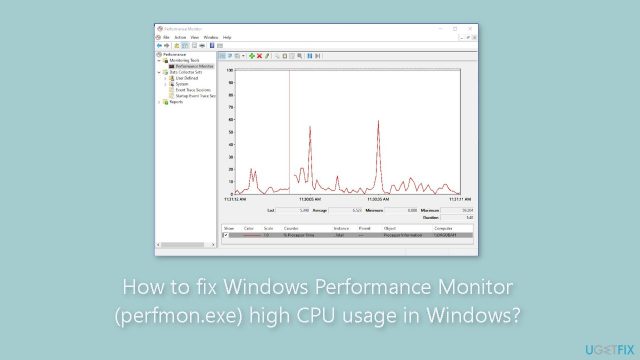
Performance Monitor (perfmon) tracks CPU load and system health over long periods. Add counters like “Processor % Processor Time” and specific process metrics to see workload patterns across hours or days, exposing creeping background issues.
Use Command-Line Tools for Deeper Inspection
Run “tasklist /v” in Command Prompt for detailed process info—CPU time, window titles, and more. Pair it with “wmic process get name,processid,usermodeTime” to script custom monitoring. This method catches runaway background tasks missed by GUI tools.
Cross-Reference Known High CPU Culprits
Windows Search Indexer, Superfetch (SysMain), Windows Update, and Antivirus scans often cause CPU spikes. Spotting these names helps decide if the load is expected and temporary—or if it’s time to hunt fixes or disable tasks.
High CPU use from background Windows processes demands careful digging through built-in utilities (in most cases). You get layers of detail—from simple lists to kernel thread activity—that help pinpoint problems without installing extra software. Understanding these tools stops you from prematurely ending processes essential to system stability.
Effective diagnostics come from watching CPU trends over minutes or longer. Noting when tasks align with updates or overstaying their welcome pulls inefficient apps into the light. This patient observation is key. For exact commands and advanced usage, consult Microsoft’s Sysinternals and Windows docs. The Windows Tasklist Command Reference is a solid place to start.
Step-by-Step Fix Methods for High CPU Usage From Background Processes
Open Task Manager to Identify CPU-Hogging Processes
Press Ctrl+Shift+Esc to open Task Manager. Click the “Processes” tab and sort by CPU usage. The biggest culprits hogging CPU power show up right away, making it easier to spot what’s slowing you down.
Use the Details Tab for Precise Process Insights
Switch to the “Details” tab for a closer look. You’ll see process IDs and exact CPU percentages. This helps tell if a process’s high CPU use is normal or suspicious—especially the difference between system-critical tasks and random apps.
Disable Unnecessary Startup Programs
Type “msconfig” into the search bar or open the Startup tab in Task Manager. Turn off programs that launch at boot but don’t need to. These invisible runaways can chew CPU right after you start your PC.
Adjust Windows Search Indexing Options
Windows Search speeds up file finds but causes CPU spikes during intense indexing. Open “Indexing Options” in Control Panel and remove folders you rarely search. This cuts down CPU drain while keeping searches snappy.
Check and Update Device Drivers
Old or broken drivers mess with CPU cycles. In Device Manager, right-click on big parts like graphics or network cards and hit “Update driver.” Getting the latest drivers often smooths power use and kills bugs.
Apply Windows Updates Promptly
Microsoft pushes patches that fix bugs causing weird CPU spikes. Open Settings > Update & Security > Windows Update and hit “Check for updates.” Installing these can stop background tasks from eating your CPU alive.
Run a Full System Scan for Malware
Malware hides and slurps CPU time. Use Windows Defender or another reliable antivirus to scan everything. Quarantine or delete threats that sneak in and slow your system down.
Manage Scheduled Tasks that Trigger Excessive Load
Windows runs background jobs like restore points and disk cleanup. Open Task Scheduler by searching for it and review what’s set to run. You can turn off or delay less-important tasks to quieter times, stopping them from spiking CPU.
Clear Temporary Files and Improve Disk Usage
Trash piles up in temp files and can trip CPU during cleanups. Run Disk Cleanup (type “cleanmgr” in search) to wipe caches and empty the Recycle Bin, trimming needless background chewing.
Set Power Options to Balanced or Power Saver Mode
Power-hungry plans can keep the CPU pumped full throttle. Go to Control Panel > Power Options and pick “Balanced” or “Power saver.” This lets Windows dial down the CPU when full speed isn’t needed.
Disable Background Apps Not In Use
Head into Settings > Privacy > Background apps and switch off those always running but rarely used. This stops needless CPU use when you’re not interacting with those apps.
Adjust Visual Effects to Improve Performance
Fancy animations quietly eat CPU and GPU cycles. Open System Properties > Advanced system settings > Performance Settings and choose “Adjust for best performance” to ditch shadows and effects that weigh down your processor.
Use Resource Monitor to Track Detailed CPU, Disk, and Network Activity
From Task Manager’s Performance tab, click “Open Resource Monitor.” This tool breaks down CPU use by threads and services and maps disk and network activity. Seeing if CPU spikes match file or network work can sharpen your troubleshooting.
Temporarily Disable Windows Update Delivery Optimization
Delivery Optimization shares updates peer-to-peer, sometimes gobbling CPU. Go to Settings > Update & Security > Delivery Optimization and turn off “Allow downloads from other PCs” to cut background chatter.
Perform a Clean Boot to Isolate Impactful Services
Restart with minimal services running. Type “msconfig,” pick “Selective startup,” and disable non-Microsoft services under the Services tab. Watch how CPU behaves—this helps find which background programs cause trouble.
Investigate Specific High CPU Processes Before Disabling
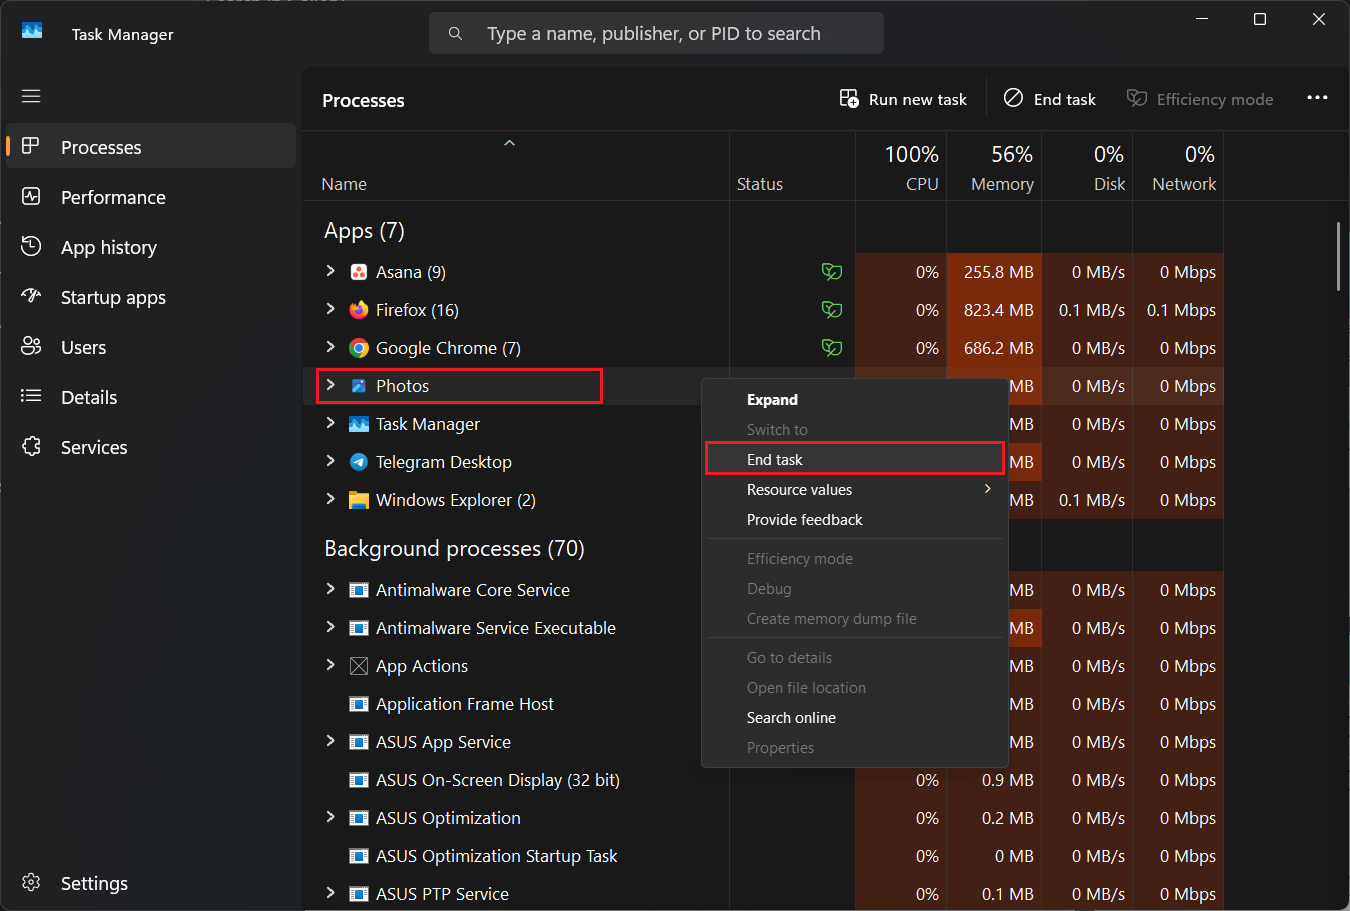
Don’t just kill unknown system processes. Check Microsoft Docs or trusted tech forums first. Some high-CPU processes are vital; stopping them might cause crashes or instability.
Update or Reinstall Problematic Software
Apps that suck CPU may need patches or a clean reinstall. Look for vendor updates. Reinstalling can fix corrupted background components that cling to processor time.
Improve Antivirus Settings for Scheduled Scans
Set your antivirus to scan during off-hours. Constant background scanning spikes CPU loads. Adjust scan schedules inside your antivirus dashboard to smooth out performance during work times.
Set Limits for CPU Usage via Group Policy Editor or Registry
Advanced users can throttle CPU time for background services using gpedit.msc or registry tweaks. This keeps runaway processes from starving other apps, especially on machines with limited resources.
Reboot After Each Change to Monitor Effectiveness
Many Windows processes linger after closing apps. Restarting confirms if your tweaks actually cut CPU load during startup and normal use.
This patchwork of fixes arms you with clear moves to tame background CPU hogs, holding onto essential services while freeing your system to work fast. For close looks into Windows process roles, visit Microsoft’s developer docs. That’s where you’ll find detailed maps of what keeps your system ticking under the hood.
Preventive Tips to Avoid Future High CPU Usage
Keep Windows Updated Regularly
Microsoft releases patches all the time. Many fix background tasks that eat CPU power. Set updates to install automatically, but schedule them off-hours so they don’t interrupt your workflow.
Manage Startup Programs
Open Task Manager’s Startup tab. Disable programs unnecessary at boot. Each disabled app frees CPU cycles for active work, giving your system breathing room right from the start.
Schedule Antivirus Scans Wisely
Don’t let antivirus run deep scans during busy periods. Schedule scans for idle hours instead. This keeps security tight without dragging your machine’s speed down needlessly.
Limit Background App Permissions
Handle to Settings > Privacy > Background apps. Turn off any app you don’t want running silently in the background. Even hidden tasks nibble at CPU resources over time.
Clear Temporary Files and Cache Frequently
Cache and temp files accumulate relentlessly. They degrade responsiveness and force extra CPU work like constant indexing. Disk Cleanup or third-party tools run regularly can keep these piles from bogging you down.
Adjust Visual Effects for Best Performance
Head to System Properties > Advanced > Performance Settings. Select “Adjust for best performance.” Animations and shadows get killed off, slashing covert CPU drain without you noticing.
Update Device Drivers
Outdated or corrupted drivers cause odd CPU spikes and erratic behavior. Check Device Manager often for signs of trouble. Then download fresh drivers straight from hardware makers to solve conflicts and boost speed.
Monitor Task Manager for Abnormal Activity
Open Task Manager from time to time. Look for processes hogging more CPU than they should. These sneaky background tasks often cause sluggishness that’s otherwise hard to trace.
Use Resource Monitor for In-Depth Analysis
Resource Monitor digs deeper than Task Manager can. It identifies which processes or services are consistently chewing CPU time. Persistent spikes? This tool zeroes in on hidden offenders lurking behind the scenes.
Set Power Plan to Balanced or Power Saver
High-performance mode cranks CPU speed but also lets background tasks run wild. Choose Balanced or Power Saver modes instead. They throttle CPU usage during idle phases, slashing wasteful cycles quietly.
Disable Unnecessary Windows Services
Some Windows services—like Search, Superfetch, or Update—trigger CPU spikes. You can disable them if they’re nonessential. Just back up your system first so you can revert changes if needed.
Configure Scheduled Tasks Strategically
Windows Task Scheduler may cram heavy jobs—updates, diagnostics, backups—all at once. Spread these out. Overlapping CPU demands create bottlenecks, making your whole system crawl.
Keep Installed Software Lean
Remove old or rarely used apps. They often keep background services alive or check for updates without you knowing. Every extra service adds CPU load, stacking up rapidly.
Use Lightweight Alternatives
Replace bulky programs with lighter options. For instance, swap a heavy media player or browser for one known to be frugal on CPU and memory. It’s an easy way to clip hidden resource hogs.
Regularly Restart Your PC
A quick reboot clears cached processes and resets stuck services. If your PC runs for days, background tasks silently accumulate and throttle performance over time.
Keeping a close eye on background processes and software health is central to this Step-By-Step Guide To Fixing High CPU Usage Caused By Background Windows Processes. These steps shift CPU load balance and keep your machine responsive. For close looks into CPU behavior and managing Windows services, Microsoft’s official documentation delivers the technical details you need.
Common Concerns and Practical Fixes for High CPU Usage
Identifying Processes Hogging CPU with Task Manager
Task Manager is your first stop to find which Windows processes suddenly hog CPU. Press Ctrl+Shift+Esc and watch a live list sorted by CPU consumption. This view lets you separate routine system tasks from the ones spiking unexpectedly. Digging deeper, the detailed view breaks down app threads, revealing hints on what triggers the surge next. Demand spikes happen fast.
When to Use Resource Monitor for Deeper Insights
Resource Monitor probes more deeply than Task Manager, covering CPU, disk, and memory at the thread and service level. You can launch it from Task Manager’s “Open Resource Monitor” or run “resmon” via the Run dialog. It exposes subprocesses and service threads inside each process—sometimes revealing system interrupts or driver hang-ups without needing extra tools.
Steps to Safely Disable Non-Essential Background Tasks
Don’t rush to stop processes, especially those linked to Windows core functionality. Use services.msc to inspect and pause questionable services, but only after you understand their role. Changing Startup type to Manual for non-critical services reduces unnecessary CPU load. Antivirus and update services, however, are off-limits—tampering can cause crashes or security gaps.
Managing Startup Programs to Reduce CPU Load at Boot
Many programs silently launch at boot and tug on your CPU from the start. Check Task Manager’s Startup tab for enabled apps you rarely open yourself. Disabling high-demand apps here cuts your boot-time CPU spike—no need to uninstall anything. This lighter boot load also eases background CPU use later during your session.
Using Windows Update and Driver Updates to Fix CPU Bugs
Outdated drivers or patchless Windows versions sometimes lead certain processes to run wild on CPU. Regularly check for system updates through Settings > Update & Security or directly on manufacturer websites. These patches fix bugs identified by Windows Performance Analyzer, acting as your first defense against weird slowdowns or CPU freakouts.
Running Antivirus Scans to Rule Out Malware Influence
Malware often masquerades as ordinary processes and stealthily drains CPU cycles. Running a full scan with Windows Defender or a trusted antivirus is key. Some infections latch onto typical tasks like svchost.exe or rundll32.exe, ballooning CPU use quietly in the background. Cleaning these threats cuts off stealthy resource drains, smoothing your system’s flow.
Clearing Temporary Files and Improving Disk Throughput
CPU spikes aren’t always about CPU itself—sometimes disk sluggishness stalls processes. Temporary files accumulate rapidly and choke disk responsiveness. Running Disk Cleanup (cleanmgr.exe) or toggling Storage Sense in Settings removes these junk files. This clears disk bottlenecks, letting services execute faster—a key fix when CPU climbs alongside slow disk activity.
When to Seek Professional Assistance for Persistent CPU Issues
If CPU usage remains stubbornly high despite your efforts, consider expert help. Complex configurations or faulty hardware can cause cryptic CPU drains invisible to basic tools. A technician runs deep diagnostics—hardware stress tests or rootkit malware sweeps—to prevent costly data loss or downtime. Early intervention beats expensive, drawn-out fixes.
Preserving System Stability While Fixing CPU Problems
CPU fixes aren’t about randomly killing processes. Abruptly ending critical tasks risks freezing Windows or breaking integral features. Track changes carefully, back up progress, and create system restore points before major adjustments. This ensures you don’t fix one problem while wrecking security or system stability in the process.
The Role of System Configuration Utility in CPU Troubleshooting
Msconfig.exe centralizes tweaks to startup, boot modes, and running services—those common CPU culprits. Using selective startup, you can toggle services or drivers to pinpoint real CPU hogs. This trial and error approach exposes problems Task Manager might miss, making targeted fixes more precise.
Recognizing When CPU Usage Is Normal for Background Processes
Not every CPU spike signals trouble. Tasks like indexing, updates, or virus scans push CPU usage temporarily and then settle. Observing the duration and frequency of spikes helps determine if it’s just Windows doing routine work or something else going wrong.
Using Performance Monitor for Long-Term Tracking
Performance Monitor lets you track CPU use over hours or even days, beyond quick Task Manager views. You can set alerts on key metrics to catch repeated background task spikes. Its logs provide solid evidence to verify whether fixes worked or further tuning is needed for smoother system operation.
Avoiding Common Pitfalls in CPU Usage Fix Attempts
Major blunders include killing essential processes or missing malware scans entirely. For instance, blindly terminating svchost risks system crashes—it runs critical services bundled together. Always research a process’s function before intervention. Skipping malware checks only masks symptoms and prolongs CPU issues while risking security.
Integrating Routine Maintenance to Prevent Future CPU Surges
The surest CPU defense is regular upkeep: updates, antivirus scans, startup management, and disk cleanups. Monthly routines combined with built-in diagnostic tools guided by this practical checklist keep your PC responsive. This avoids frantic, last-minute troubleshooting battles.
This guide answers common questions and outlines safe, hands-on steps to tame high CPU use from background Windows processes, all without risking your system’s health. Keep this knowledge handy to maintain stability and speed well into 2026 and beyond. For detailed diagnostics, check Microsoft’s official performance troubleshooting documentation.